
Inflatable Boat Repair Information and Procedures
PLEASE READ CAREFULLY AND COMPLETELY BEFORE PROCEEDING:
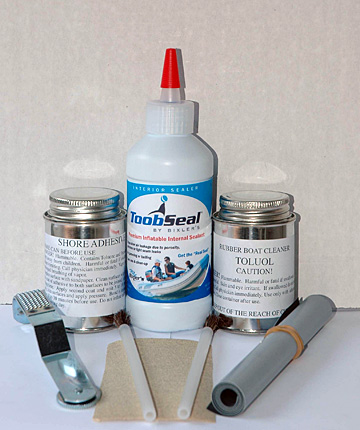
You will need to supply rubber gloves and masking tape:
The repair needs to be done indoors in a low humidity environment. Clean the boat in order to prevent dust and dirt from getting on the tacky glue. Carefully, clean old glue off of repair area using a small amount of suppliedToluene on a lint free cloth. Always wear gloves when using glues and solvents. If you have used Armorall or other silicone based cleaning products, our adhesive as well as any and all inflatable boat glues will have difficulty bonding. Extra cleaning may help.
Make sure patch is roughly 2” larger than damaged area and cut with rounded corners. Mark perimeter of patch on boat with pencil then carefully put masking tape all around the pencil mark leaving roughly 1/8 “ around the pencil mark. The masking tape will protect the boat from accidental excess glue and/or MEK but you should still be very careful not to get the solvents outside the repair area. Roughen the penciled in area with supplied sandpaper being careful just to remove the top coating of Hypalon and not the fabric threads deeper down. Roughen the underside of the patch also. Wipe the boat as well as the patch with Toluene and allow to dry. This is a very important step as the surfaces must be completely cleaned of oils, cleaners and dust. Using the brush, apply a thin coat of adhesive to both surfaces and allow to dry roughly 15 – 20 minutes, or until glue is dry/slightly tacky to the touch (use your knuckle as there are less oils than your fingertip). Apply a second thin coat to both the patch and the boat and allow to dry for roughly 15 – 20 minutes again, make sure glue is dry/slightly tacky to the touch.
Once the adhesive is tacky to the touch, using a blow dryer to reactivate the adhesive minimizes the complicating effects of humidity and air temperature. Warm both surfaces with a hairdryer. The surfaces are ready to join when they are warm. Join surfaces from the center of the patch out towards the edges so no air is trapped under the patch. Curving the patch so the center contacts the surface first and pressing firmly helps insure 100% adhesion stress area directly under the patch. Bond is immediate.
Use the supplied roller and roll the patch from the center towards the edge. Roll every centimeter of the patch as this will force air bubbles out as well as solidify the bond. Be careful not to allow the roller off the patch as it can mark the boat particularly when the boat has been softened with solvent, adhesive and heat. Allow 6 hours to dry. Low humidity atmosphere is the ideal condition. Do not inflate to full pressure for 12 hours.
Price Starting at $84.95

PVC Repair Kit
PLEASE READ CAREFULLY AND COMPLETELY BEFORE PROCEEDING:
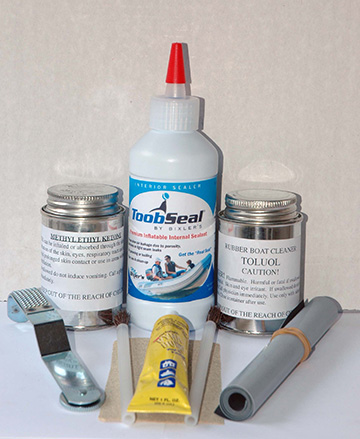
You will need to supply rubber gloves and masking tape:
The repair needs to be done indoors in a low humidity, well ventilated environment. Clean the boat in order to prevent dust and dirt from getting on the tacky glue. Carefully, clean old glue off of repair area using a small amount of supplied MEK on a lint free cloth. Always wear gloves when using glues and solvents.
Make sure patch is roughly 2” larger than damaged area and cut with rounded corners. Mark perimeter of patch on boat with pencil then carefully put masking tape all around the pencil mark leaving roughly 1/8 “ around the pencil mark. The masking tape will protect the boat from accidental excess glue and/or MEK but you should still be very careful not to get the solvents outside the repair area. Using the supplied brush, thinly apply 2 coats of MEK within the penciled in area (light coating or you will damage material*) and 2 light coats to the patch allowing each coat to evaporate. Using the 2nd brush, apply a thin coat of supplied Vyna-bond adhesive to both surfaces (following the MEK lines) and allow to dry roughly 3 – 10 minutes (depending on humidity levels). MAKE SURE adhesive is DRY to the touch because if wet adhesive is covered by a patch it can damage the material touch (use your knuckle as there are less oils than your fingertips). Apply a second thin coat to both the patch and the boat and allow to dry for roughly 3 – 10 minutes again, make sure glue is dry to the touch.
Once the adhesive is dry to the touch, using a blow dryer to re-activate the adhesive minimizes the complicating effects of humidity and air temperature. Warm both surfaces with a hairdryer. The surfaces are ready to join when they are warm. Join surfaces from the center of the patch out towards the edges so no air is trapped under the patch. Curving the patch so the center contacts the surface first and pressing firmly helps insure 100% adhesion stress area directly under the patch. Bond is immediate.
Use the supplied roller and roll the patch from the center towards the edge. Roll every centimeter of the patch as this will force air bubbles out as well as solidify the bond. Be careful not to allow the roller off the patch as it can mark the boat particularly when the boat has been softened with solvent, adhesive and heat. Allow 6 hours to dry. Low humidity atmosphere is the ideal condition. Do not inflate to full pressure for 12 hours.
*Our tests indicate that Vyna-Bond without MEK does not make a good bond. We mention this because the instructions on Vyna-bond tubes do not mention MEK. MEK actually dissolves the thin outer coating of PVC and allows the adhesive to penetrate the surface producing a better bond, much like a Hypalon repair which requires the tube and patch to be “roughed up” with sand paper. If you have used Armorall or other silicone based cleaning products, Vyna-Bond as well as any and all inflatable boat glues will have difficulty bonding. Extra cleaning may help.
Price: $84.95

